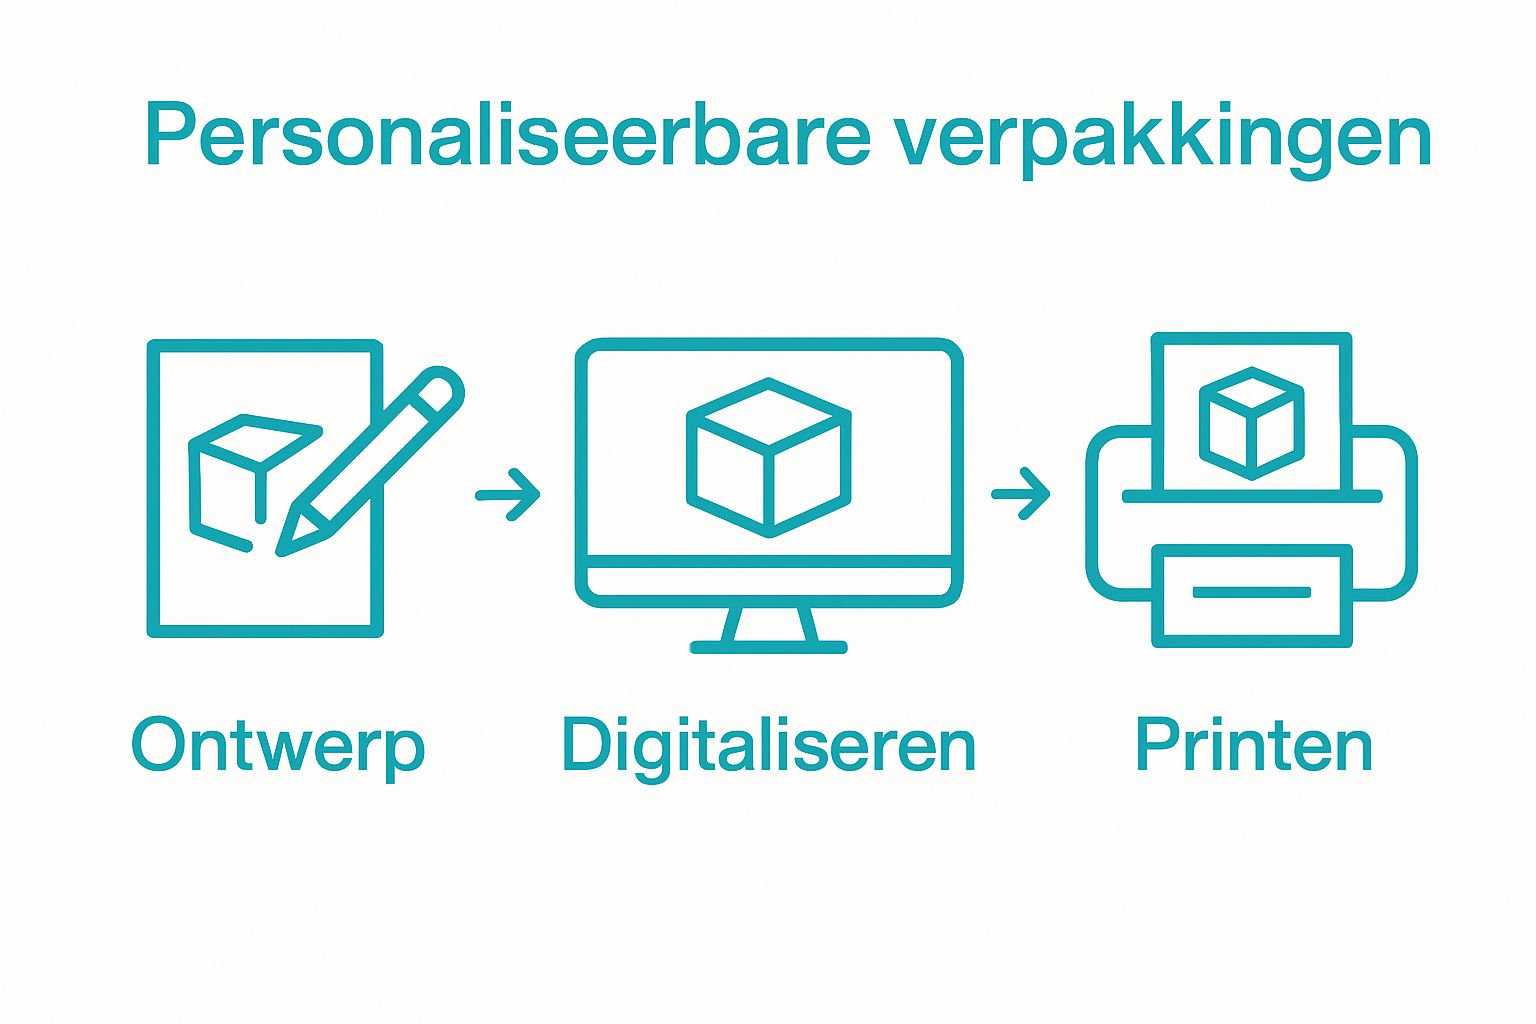
Create customizable packaging for any occasion
Everyone knows the feeling of waiting for the perfect gift and getting excited just by seeing the packaging. Yet, research shows that personally designed packaging is remembered up to 30 percent better than standard packaging. Surprisingly, effective packaging isn't just about aesthetics or a luxurious feel. The right combination of design choices, materials, and finish determines whether that first impression is memorable or instantly forgotten.
Table of contents
- Step 1: Determine your packaging design needs
- Step 2: Choose the right materials and resources for personalization
- Step 3: Develop and digitize your packaging design
- Step 4: Print and cut the packaging according to specifications
- Step 5: Verify quality and adjust if necessary
Short Summary
| Important Point | Explanation |
|---|---|
| 1. Determine your design needs | Analyze your target audience, purpose, and desired packaging appearance for an effective design. |
| 2. Choose the right materials | Select materials that match the function and emotional impact of your packaging to make a lasting impression. |
| 3. Digitize your design accurately | Use graphic design tools and pay attention to technical specifications to optimally display your creation. |
| 4. Perform quality control | Carefully inspect your packaging for color, cut accuracy, and finish to meet your quality standards. |
| 5. Be flexible and experiment | Be open to feedback and adjust your design to get the best results. |
Step 1: Determine your packaging design needs
Designing customizable packaging begins with a thorough analysis of your specific needs. Before you begin creating unique packaging, it's crucial to gain a detailed understanding of the purpose, target audience, and the message you want to convey.
Start by asking yourself some fundamental questions about the packaging. Is it a gift for a special occasion , like a wedding or birthday? Or are you creating packaging for business purposes like product shipping or brand promotion? Each context requires a different approach to design and materials.
Next, you need to consider the practical aspects . What are the dimensions of the items you want to package? Which materials are suitable considering the weight and fragility of the contents? Consider, for example, the strength of cardboard for heavy items or the softness of tissue paper for delicate gifts. Discover more about professional packaging solutions that can help meet your specific needs.
When determining your design needs, there are some important aspects to consider:
- Functional requirements of the packaging
- Desired visual appearance
- Budget and available materials
- Sustainability goals
Consider the emotional impact your packaging can have. Well-designed packaging tells a story and creates an unforgettable first impression. Whether it's a sleek, business-like design or a playful birthday package, every choice contributes to the recipient's overall experience.
Finally, it's essential to remain flexible in your design process. Experiment with different concepts, ask for feedback, and don't be afraid to adjust your initial ideas. The perfect design comes from iteration and an open mind about possibilities.
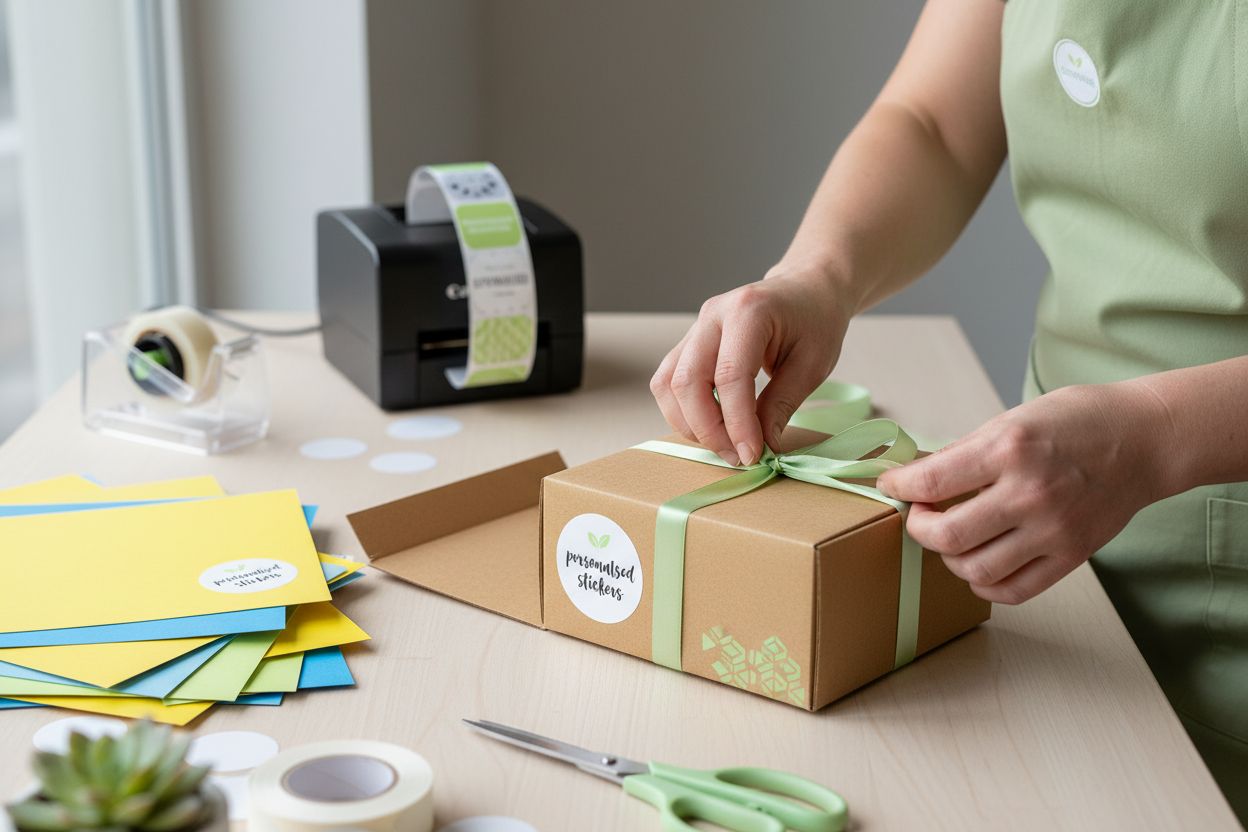
Step 2: Choose the right materials and resources for personalization
After determining your design needs, the next crucial step is selecting the right materials and personalization options for your packaging. This choice can make the difference between ordinary packaging and an unforgettable experience.
Start by considering the basic materials. Paper types play a key role in personalized packaging. From sturdy kraft paper to delicate tissue paper, each material tells a different story. Explore our guide to basic gift wrapping materials for detailed insights into material options.
Various techniques are available for personalization. Think of printed labels, personalized stickers, handwritten messages, or stamped decorations. Digital printing allows you to apply photos, logos, and personalized text directly to packaging. Also consider color palettes that align with your brand identity or the specific occasion.
Here are some critical considerations for material and personalization choices:
- Sustainability of the chosen material
- Printing technique and quality of personalization
- Cost per unit
- Expected visual impact
An often overlooked factor is the tactile experience . The texture of your packaging can be just as telling as its appearance. Matte finishes convey a sophisticated feel, while glossy surfaces appear more festive. Experiment with different material combinations to achieve your desired atmosphere.
Also, ensure your personalization tools remain practical and functional. A beautiful design shouldn't detract from the packaging or reduce the protection of its contents. Balance aesthetics with functionality for the best results. Test different materials and personalization techniques to find the perfect combination that best reflects your message and style.
Below you will find a table that compares the most important materials and personalization techniques for packaging at a glance to make selection easier.
| Material | Feature / Benefit | Application / Personalization technique |
|---|---|---|
| Cardboard | Strong, protective | Digital printing, stamping, labels |
| Kraft paper | Natural look, sustainable | Printing, stickers, stamps |
| Tissue paper | Soft, decorative | Handwritten message, printing |
| Stickers/Labels | Easy to apply, flexible | Logo, text or images, colorful |
| Ribbon/Ribbons | Visual accent, easy to add | Button, bow, color accent |
| Digital print | High resolution, lots of design freedom | Photos, logos, personal message |
| Handwritten | Personal, unique | Short text, name, message |
Step 3: Develop and digitize your packaging design
After selecting the right materials, the exciting phase of actually developing and digitizing your packaging design begins. This is when your creative vision becomes reality and you take your first steps toward personalized packaging.
Start by sketching your initial design. Use graphic design tools like Adobe Illustrator or free alternatives like Canva to develop your first concepts. Check out our webshop packaging design tips for further inspiration and practical guidelines.
When digitizing your design, it's crucial to consider technical specifications . Pay attention to resolution, color space, and file formats that are compatible with professional printing processes. Vector graphics, for example, are ideal for sharp lines and unlimited scalability, while high-resolution PNG or TIFF files are suitable for detailed images.
The digital phase demands precision and attention to detail. Professional design tools offer advanced capabilities for optimizing your packaging design, such as:
- Accurate sizing
- Color control
- Layer management
- Sample view
It is wise to make several design versions and evaluate them critically.
 Ask for feedback from colleagues, potential customers, or professionals in the packaging industry. Every comment can help you refine and improve.
Also consider the practical aspects of digitization. Make sure your files are compatible with the printing techniques you'll be using. Some printing processes have specific requirements for file formats, color models, and resolution. Always test your design before proceeding with final production.
Finally, digitization is more than just technical precision. It's about preserving the original creativity and message of your design. Make sure your digital version feels just as inspiring and personal as your original sketch.
Step 4: Print and cut the packaging according to specifications
After digitizing your design, it's time to bring it to life. Printing and cutting packaging requires precision, craftsmanship, and the right tools to bring your creative vision to life.
Print preparation is crucial for a perfect final result. Double-check your digital files for accuracy before printing. Calibrate your printer or work with a professional printer specializing in packaging materials. Explore our special wrapping paper collections for inspiration and quality references.
When choosing the right printing method, there are several options available. Digital printing is ideal for smaller print runs and detailed designs, while screen printing is more suitable for larger quantities with simple designs. Consider factors such as color quality, material compatibility, and cost-effectiveness when making your choice.
The cutting phase requires special attention and precise tools. Use sharp, professional cutting knives or plotters suitable for your chosen material. Pay attention to the following critical aspects:
- Accuracy of cutting lines
- Suitability of the tool for the material
- Safety precautions during the cutting process
- Consistency in sizing
A common mistake is underestimating the tolerances in the cutting process. Small deviations can have major consequences for the fit and appearance of your packaging. Therefore, always make a test sample to check the accuracy before proceeding with full production.
For more complex packaging shapes, digital cutting plotters or laser cutters can offer a solution. These machines can produce highly detailed and precise cuts, even with intricate designs. Invest in quality tools or work with a professional production company specializing in personalized packaging.
Finally, it's essential to work patiently and precisely. Printing and cutting your packaging is the final step, transforming your digital design into reality. Take your time, pay attention to detail, and don't be afraid to create multiple prototypes until you achieve the perfect result.
Step 5: Verify quality and adjust if necessary
After printing and cutting your packaging, the critical phase of quality control and potential refinement begins. This is the time to critically examine every aspect of your personalized packaging to ensure it fully meets your original vision and quality standards.
Visual inspection is the first step in the qualification process. Examine your packaging under good lighting and pay attention to details such as color reproduction, cutting accuracy, and overall finish. Discover professional business packaging tips to improve your assessment skills.
During quality control, there are several aspects you should pay attention to. Check the color fidelity by comparing the design to your original digital file. Pay attention to the sharpness of printed lines, the evenness of color planes, and the precision of cut edges. Digital production methods allow for quick adjustments if minor deviations are detected.
Please note the following essential quality criteria:
- Color consistency with original design
- Accuracy of cutting lines
- Material integrity
- Absence of printing errors or damage
A practical approach is to create multiple prototypes. Test your packaging not only visually but also functionally. Check that the dimensions are correct, that the packaging is easy to open and close, and that it provides sufficient protection for the contents.
When discovering minor imperfections, it's important to proceed calmly and systematically. Minor color deviations can sometimes be corrected by adjusting the print settings. Major problems may require a new design or production cycle.
Consider the context of your packaging. Packaging for a delicate gift requires different quality standards than industrial shipping packaging. Adjust your expectations and inspection methods accordingly.
This checklist table will help you keep track of all the important checkpoints during the quality control of your custom packaging.
| Checkpoint | What to look out for | Action in case of deviation |
|---|---|---|
| Color consistency | Do the colors match the design? | Adjust print settings |
| Cutting accuracy | Cutting edges are clean and precise | Re-cut or adjust |
| Material integrity | No tears, folds, weak spots | Choose different material |
| Printing errors/damage | No stains, smeared ink, scratches | Reprint |
| Fit | Packaging fits well around the contents | Check dimensions |
| Functional test | Easy to open and close | Adjust design |
| General finishing | No loose edges, neat appearance | Apply improved finish |
Finally, quality control is more than just a technical step. It's about realizing your creative vision and delivering a product that's not only functional but also surprising and engaging. Take your time, be critical, and don't be afraid to start over if the quality doesn't meet your expectations.
Make your perfect personalized packaging a reality
Are you struggling to find the right packaging material that truly matches your unique design needs? Not sure which material best suits the purpose, atmosphere, and look of your personal or business packaging? At Kadopapier.net, you'll find a wide range of wrapping paper, tissue paper, gift bags, and decorations, giving you free rein to your creativity. Whether you're looking for sturdy cardboard boxes, playful ribbons, or stylish decorations, we're here to help you find the perfect gift for every occasion.
Stop searching for individual products and start creating an unforgettable experience for your recipient right away. Visit Kadopapier.net and discover how easy it is to find all the materials you need for a professional result. Don't wait any longer and give your personalized packaging the attention it deserves. Choose quality and convenience in one place today.
Frequently Asked Questions
How do I determine the right materials for my custom packaging?
Choose materials based on the contents and purpose of the packaging. Consider sturdy cardboard for heavier items or more delicate tissue paper for delicate gifts. Make a list of the materials you need and test different options to make the best choice.
What are the key steps in designing customizable packaging?
Start by analyzing your design needs, selecting the right materials and personalization methods, developing and digitizing your design, printing and cutting the packaging, and checking its quality. Follow these chronological steps to create successful packaging that meets all your requirements.
How can I personalize my packaging for different occasions?
Use techniques like printed labels, handwritten messages, or digital printing for logos and photos. Adapt the colors and styles to the occasion, for example, festive for a birthday or professional for business purposes. Experiment with various personalization tools to create unique designs.
What should I check during quality control of my packaging?
Check color consistency, cut line accuracy, and overall finish. Also perform functional tests, such as opening and closing the packaging. Create multiple prototypes as needed and adjust your design to ensure optimal quality.
How can I increase the emotional impact of my packaging?
Create an attractive design that reflects your brand story or the packaging's purpose. Use materials and colors that reflect the occasion, and consider a unique finish to make a lasting impression. Spend time creating a unique experience for the recipient.
How much time should I schedule for designing and producing my packaging?
Plan on approximately 4 to 6 weeks for the entire process, from design to production and quality control. This ensures you have enough time to gather feedback and make adjustments. Start early in the process to avoid unexpected delays.